Getting Started with SoC Mode
This guide describes how to get started developing an application for the SiWx91x in System-on-chip (SoC) mode, where both the application and the networking stack run on the SiWx917 chipset.
Check Prerequisites
In order to run Matter over Wi-Fi, check for the following prerequisites:
Hardware Requirements
The following hardware devices are required for executing Matter over Wi-Fi:
Refer, Hardware Requirements
Silicon Labs Wireless starter/development kit (WSTK)
SiWx917 SoC development kit
Wi-Fi Dev Kit
SiWx917
SoC mode:
BRD4388A (B0 2.0 common flash) SiWx917
Windows/Linux/MacOS computer with a USB port
USB cable for connecting WSTK Board to Computer
Raspberry Pi with a >32 GB SD Card
Access Point with Internet Access
Software Requirements
Refer to Software Requirements & Installation
Connect SiWx917 SOC to Computer
Mount the SiWx917 radio board on the SiWx917 WSTK board.
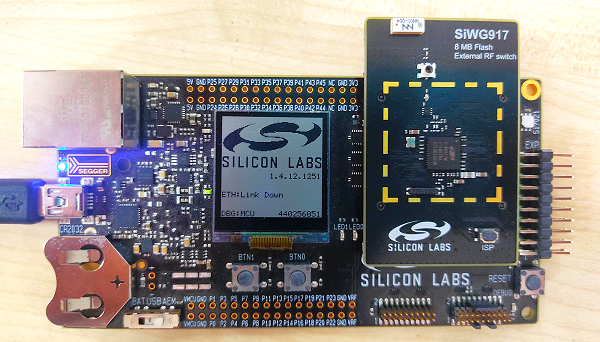
Connect your SiWx917 Wireless Starter Kit (WSTK) board to your computer using a USB cable.
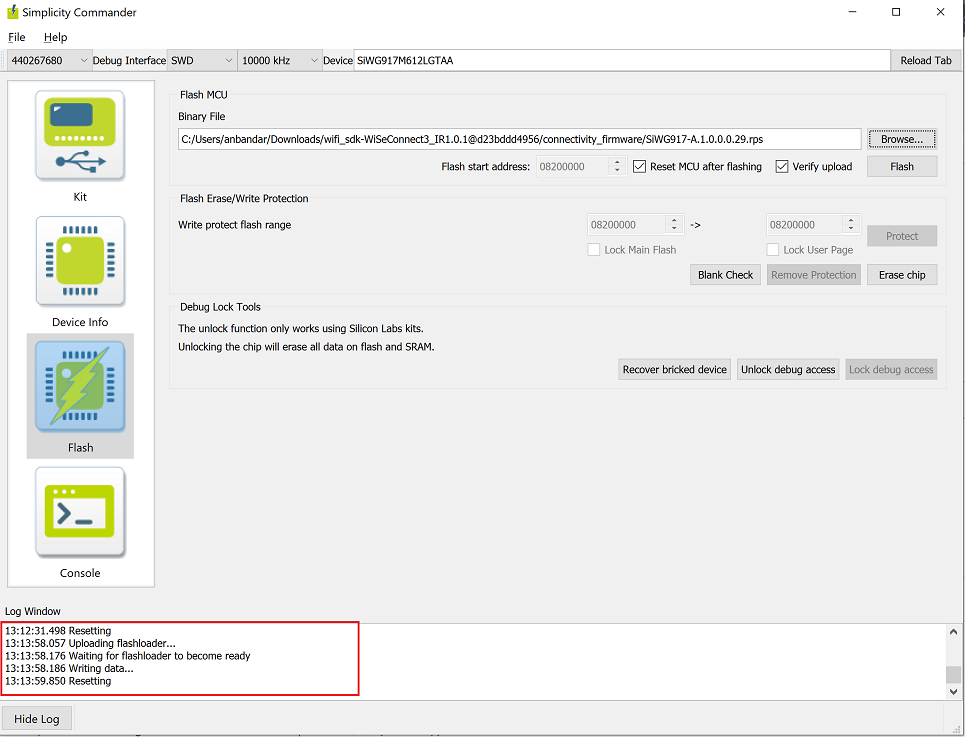
Steps to update the firmware on SiWx917 SoC radio board using Simplicity Commander
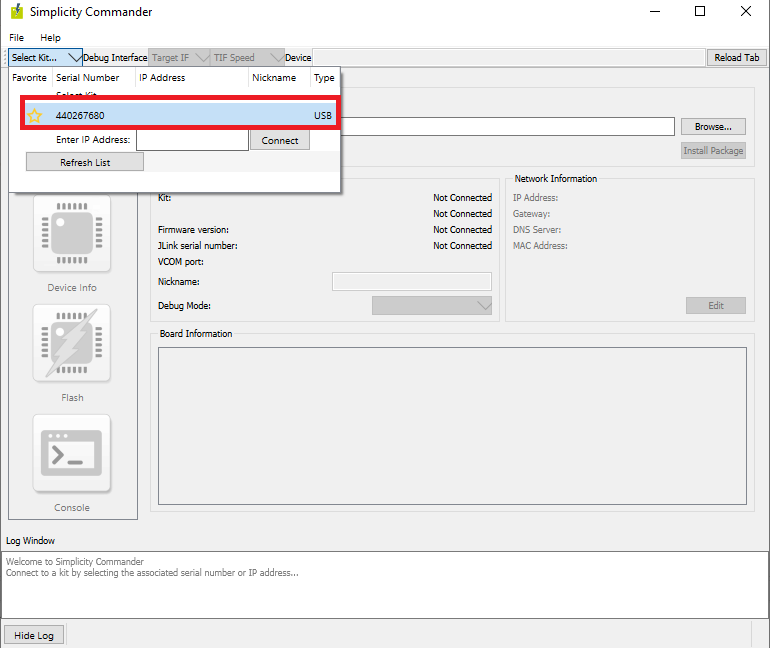
Open Simplicity Commander application.
In the Simplicity Commander window, click Select Kit and choose your radio board.
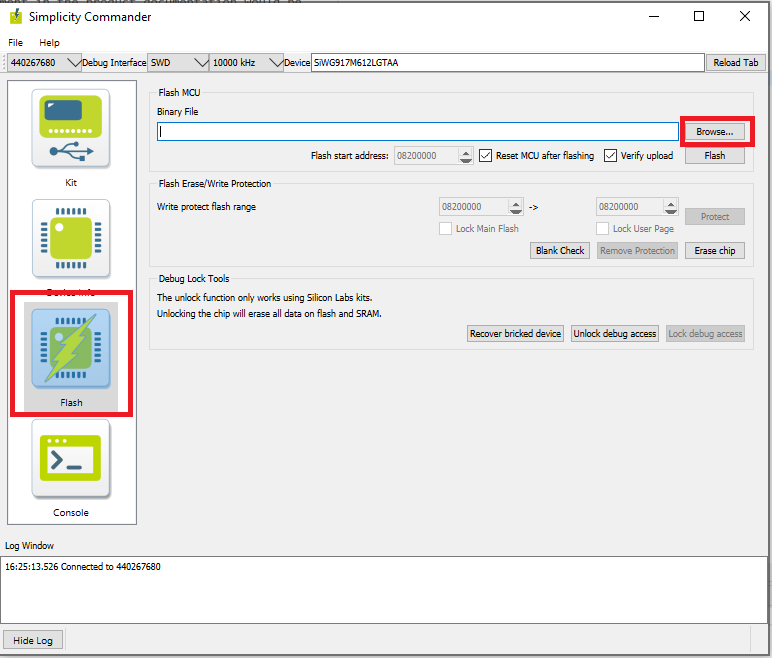
In the navigation pane, go to the Flash section.
Click Browse next to the Binary File field.
Refer Firmware for SiWx917 SoC to identify the which firmware to be flashed into the specific hardware. Locate and select the firmware file to flash.
Click Flash
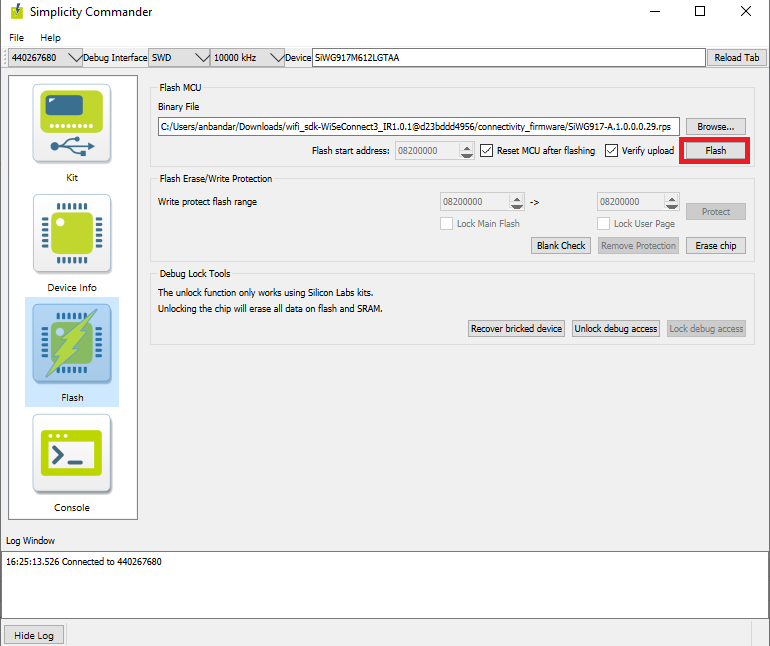
The firmware will be flashed and the Log Window will display a “Resetting” message.
Troubleshoot SiWx917 SOC Firmware Update Failure
If the firmware update fails, try the following:
Toggle the power switch towards AEM (Advanced Energy Monitoring) on the WSTK board.
Perform the following steps and try the firmware update again
Toggle the ISP switch towards ISP on the radio board.
Press the RESET button on the WSTK board.
Toggle the ISP switch away from ISP on the radio board.
In the Flash section in step 5 above, click Erase chip.
The flash will be erased.
Retry the firmware upgrade.
Building Matter Application on SOC device
To build Matter Application on SOC device, refer Building Procedure
Flashing Images/Binaries on the SiWx917 SoC platform using Ozone and Simplicity Commander
SiWx917 SoC device support is available in the latest Simplicity Commander(version 1v15p3). To flash the TA Firmware/Matter application on SiWx917 SoC,
Convert the .s37 file into .rps file using the below command,
commander rps create <output file with .rps extension> --app <input file with .s37 extension>
Flash to the device using,
commander rps load <file-name>.rps
Official support for SiWx917 SoC for Common Flash Board is not yet available in the Ozone Debugger, but can be configured - Ozone Environment Setup for SiWx917 SoC.
After creating the rps file flash the binary to the board by using Simplicity Commander, refer Flashing SiWx917 SOC Using Simplicity Commander
Flashing the Matter application using Ozone Debugger
Download the Pre-built images for SiWx917 SoC Matter Application (.out file) from Matter Artifacts page
Go to Demo Execution - Commissioning a SiWx917 SoC Device using chip-tool for Linux section, to run the demo with SiWx917 SoC
Note:
SiWx917 SoC Common flash boards are not supported by Ozone.
To enable RTT logs, download JlinkDevices.xml file from the Matter Artifacts page and install in the Jlink installation path.
Enabling JLink RTT Logs for SOC Boards
To Configure the JLink RTT Viewer for SOC board, refer Configure JLink RTT
Open JLink RTT Viewer and click on three dots beside Specify Target Device
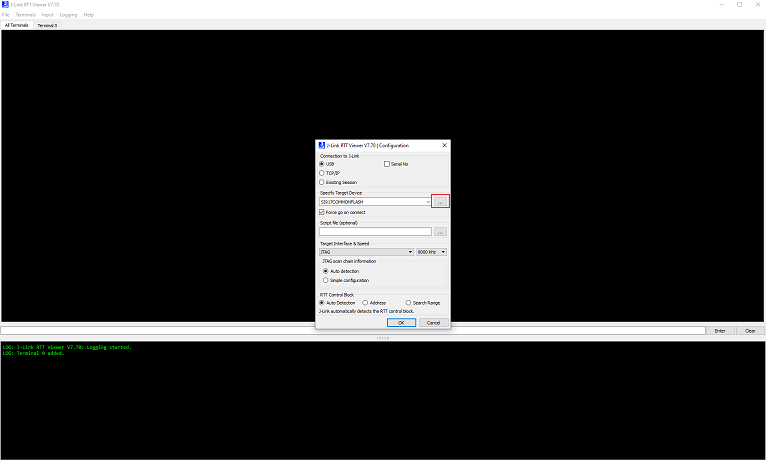
select Manufacturer as Silicon Labs and device section search
Si917CommonFlashorSi917DualFlashas per board connected to machine then click “ok”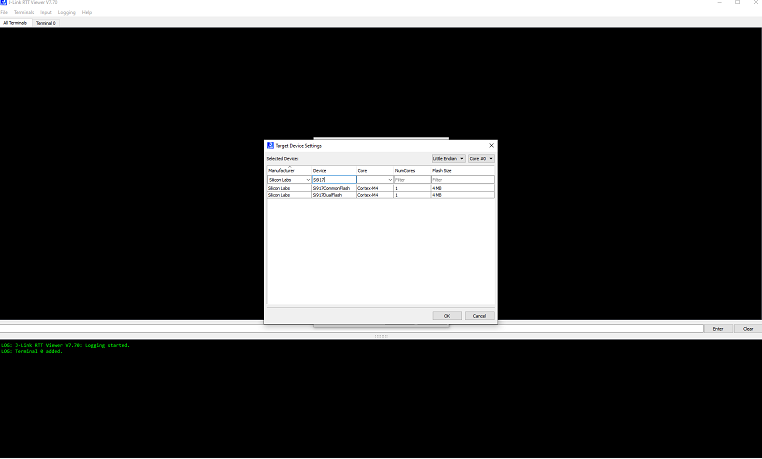
Select Target Interface as
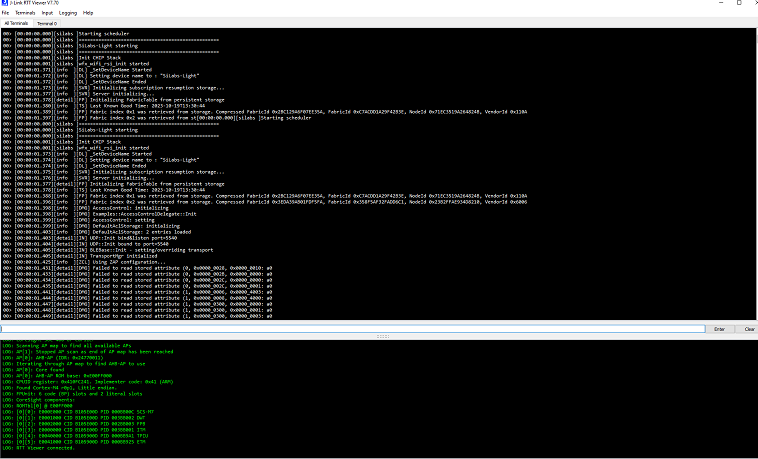
JTAG& Speed as8000KHz(Default) then click “ok”Now the JLink-RTT is connected and will print the device logs
Demo Execution - Commissioning a SiWx917 SoC Device using chip-tool for Linux
Note: Commissioning can be done using chip-tool running either on Linux or Raspberry Pi.
Get the SSID and PSK of the Wi-Fi network (WPA2 - Security) you are connected to.
Run the following:
$ cd $MATTER_WORKDIR/matter
Commissioning Command:
$ out/standalone/chip-tool pairing ble-wifi 1122 $SSID $PSK 20202021 3840
Note:
The Node ID used here is
1122. This will be used in future commands.The below given steps (3, 4, 5) are for Lighting-app, use app specific commands if you are using any other application.
To turn on the LED on the SiWx917:
$ out/standalone/chip-tool onoff on 1122 1
To turn off the LED on the SiWx917:
$ out/standalone/chip-tool onoff off 1122 1
The updated on/off state may be verified with the following command:
$ out/standalone/chip-tool onoff read on-off 1122 1
If you are having difficulty getting the chip-tool to commission the device successfully, refer to the troubleshooting information on the Running the Matter Demos over Wi-Fi on EFR32 hosts page.
As the device remembers the Access Point credentials given for commissioning, if you want to run the demo multiple times, do a Factory Reset.
The commissioning command mentioned above does the following:
chip-tool scans BLE and locates the Silicon Labs device that uses the specified discriminator
Sends the Wi-Fi SSID and Passkey
The Silicon Labs device will join the Wi-Fi network and get an IP address. It then starts providing mDNS records on IPv4 and IPv6
chip-tool then locates the device over Wi-Fi and establishes operational certificates
Future communications (tests) will then happen over Wi-Fi