Serial Port Communication on Silicon Labs Platform
The matter-shell exposes the configuration and the management APIs via matter command line interface (matter CLI). This interface can be used to change the state of the device.
Hardware Requirement
To run matter shell on Silicon Labs Platform, refer Hardware Requirements
Software Requirement
To run matter shell on Silicon Labs Platform, refer Software Requirments
Execution of Matter Shell on Silicon Labs Platform
Download and Install Tera Term in order to run matter shell.
In matter directory build matter shell application using build flag chip_build_libshell=true to enable matter shell
For WF200:-
./scripts/examples/gn_silabs_example.sh examples/lock-app/silabs/ out/wf200_lock BRD41xxx chip_build_libshell=true --wifi wf200

For RS9116:-
./scripts/examples/gn_silabs_example.sh examples/lock-app/silabs/ out/rs911x_lock BRD41xxx disable_lcd=true use_external_flash=false chip_build_libshell=true --wifi rs9116

For SiWx917 NCP:-
./scripts/examples/gn_silabs_example.sh examples/lock-app/silabs/ out/siwx917_lock BRD41xxx disable_lcd=true use_external_flash=false chip_build_libshell=true --wifi SiWx917

For SiWx917 SoC:-
./scripts/examples/gn_silabs_example.sh examples/lock-app/silabs/ out/SiWx917_lock BRD4338A chip_build_libshell=true
Connect Matter Device to the machine.
Flash the Builded binary to the board by following, Flashing the Silabs Device document.
After successful flashing commission the device , refer Commission Matter Platform
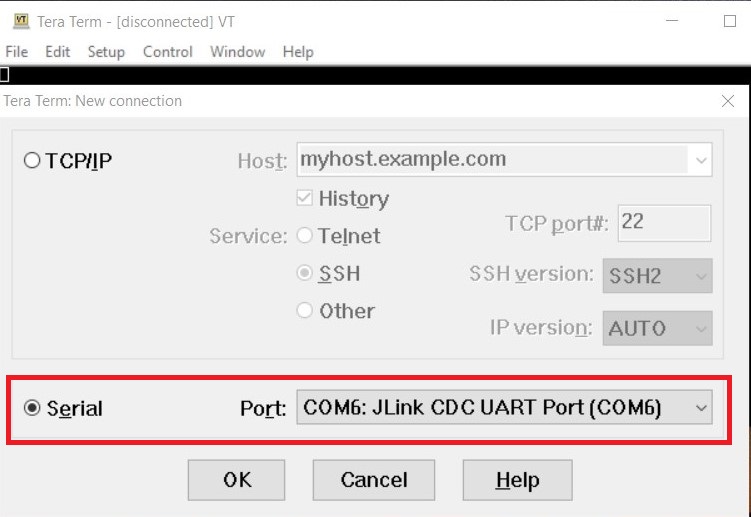
Open Tera Term and under New Connection, under Serial Port, select JLink port and click OK.
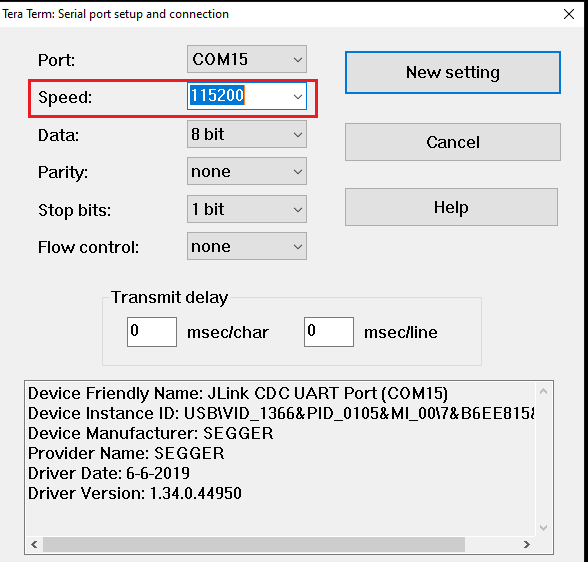
Click on Setup from Menu bar and change the value to 115200 under Speed category, then click on New setting.
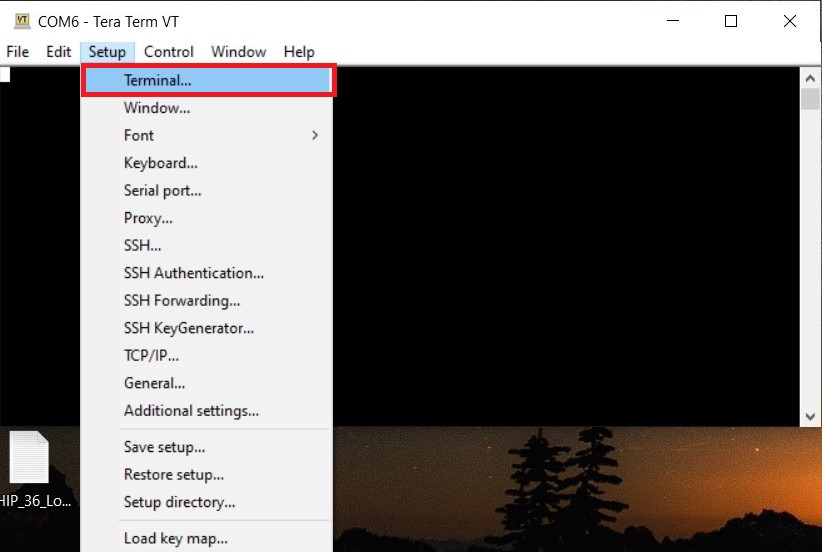
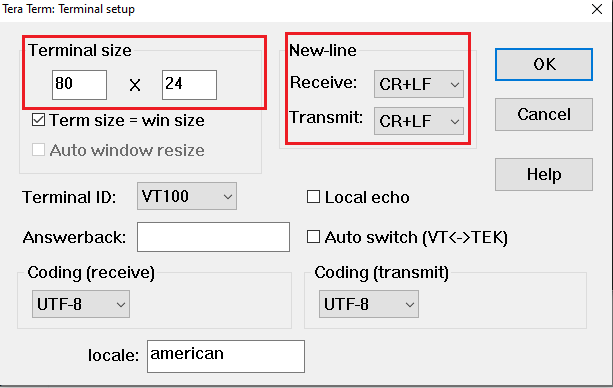
Inside Terminal Set the below values and click OK.
Terminal Size : 80 * 24
New-Line
Receive : CR+LF
Transmit : CR+LF
Click on File from Menu bar again, select Serial Port option.
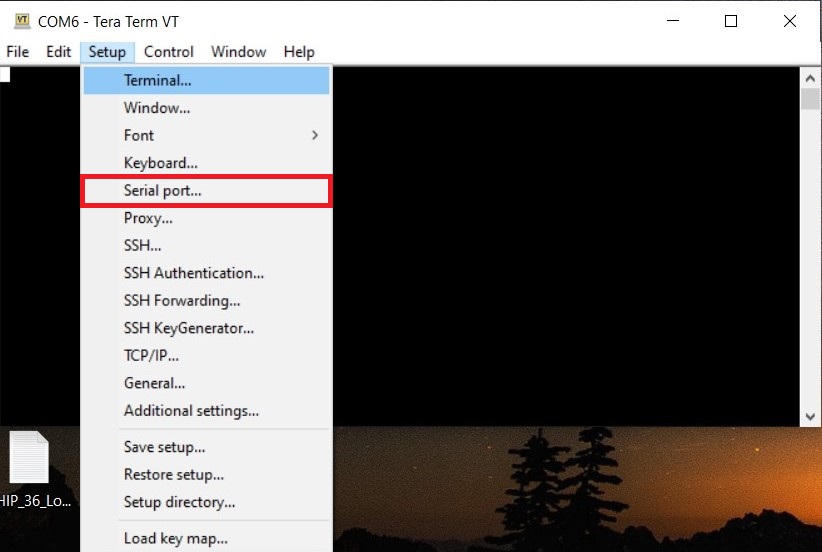
Increase the speed to 115200 and click on New setting.
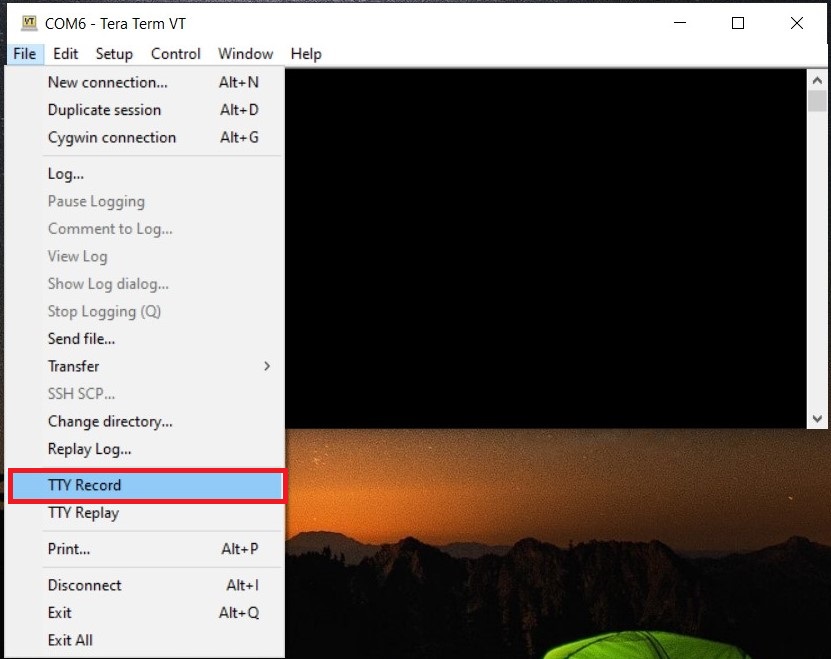
Click on File from Menu bar, select TTY Record. Create any empty file with extension “ .tty “ and click on save.
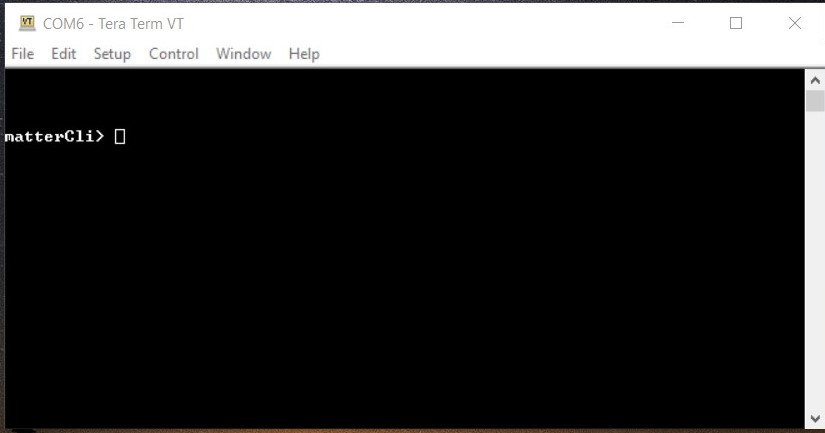
After creating tty file just click on Enter button from Keyboard then it will show you matterCli terminal.
Send any command through matterCli terminal, from the below list of commands:
doorlock event door-state-change “DoorState”
Door State List
DoorOpen = 0
DoorClosed = 1
DoorJammed = 2
DoorForcedOpen = 3
DoorUnspecifiedError = 4
DoorAjar = 5
doorlock event lock-alarm “AlarmCode”
Alarm Code List
LockJammed = 0
LockFactoryReset = 1
LockRadioPowerCycle = 3
WrongCodeEntryLimit = 4
FrontEsceutcheonRemoved = 5
DoorForcedOpen = 6
DoorAjar = 7
ForcedUser = 8
onboardingcodes ble, command will show QR Code.
For Example:-
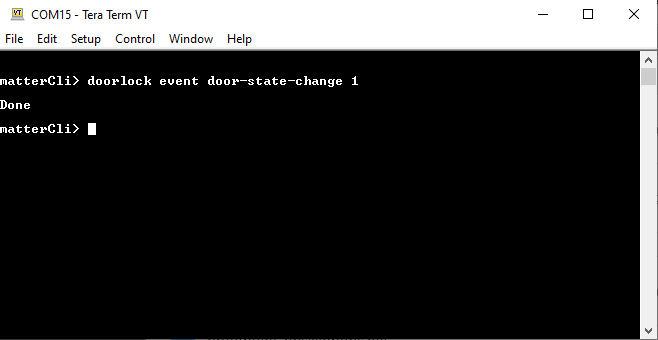
After changing DoorState and AlarmCode in matterCli, run below commands using chip-tool in raspberry pi to verify the event.
To Read Door State
./chip-tool doorlock read-event door-state-change “node_id” “endpoint”
To Read Alarm Code
./chip-tool doorlock read-event door-lock-alarm “node_id” “endpoint”
Note: Type help in matterCli terminal for more information about supported features.